Easy Steps for Wavlink 1200 Setup and Configuration
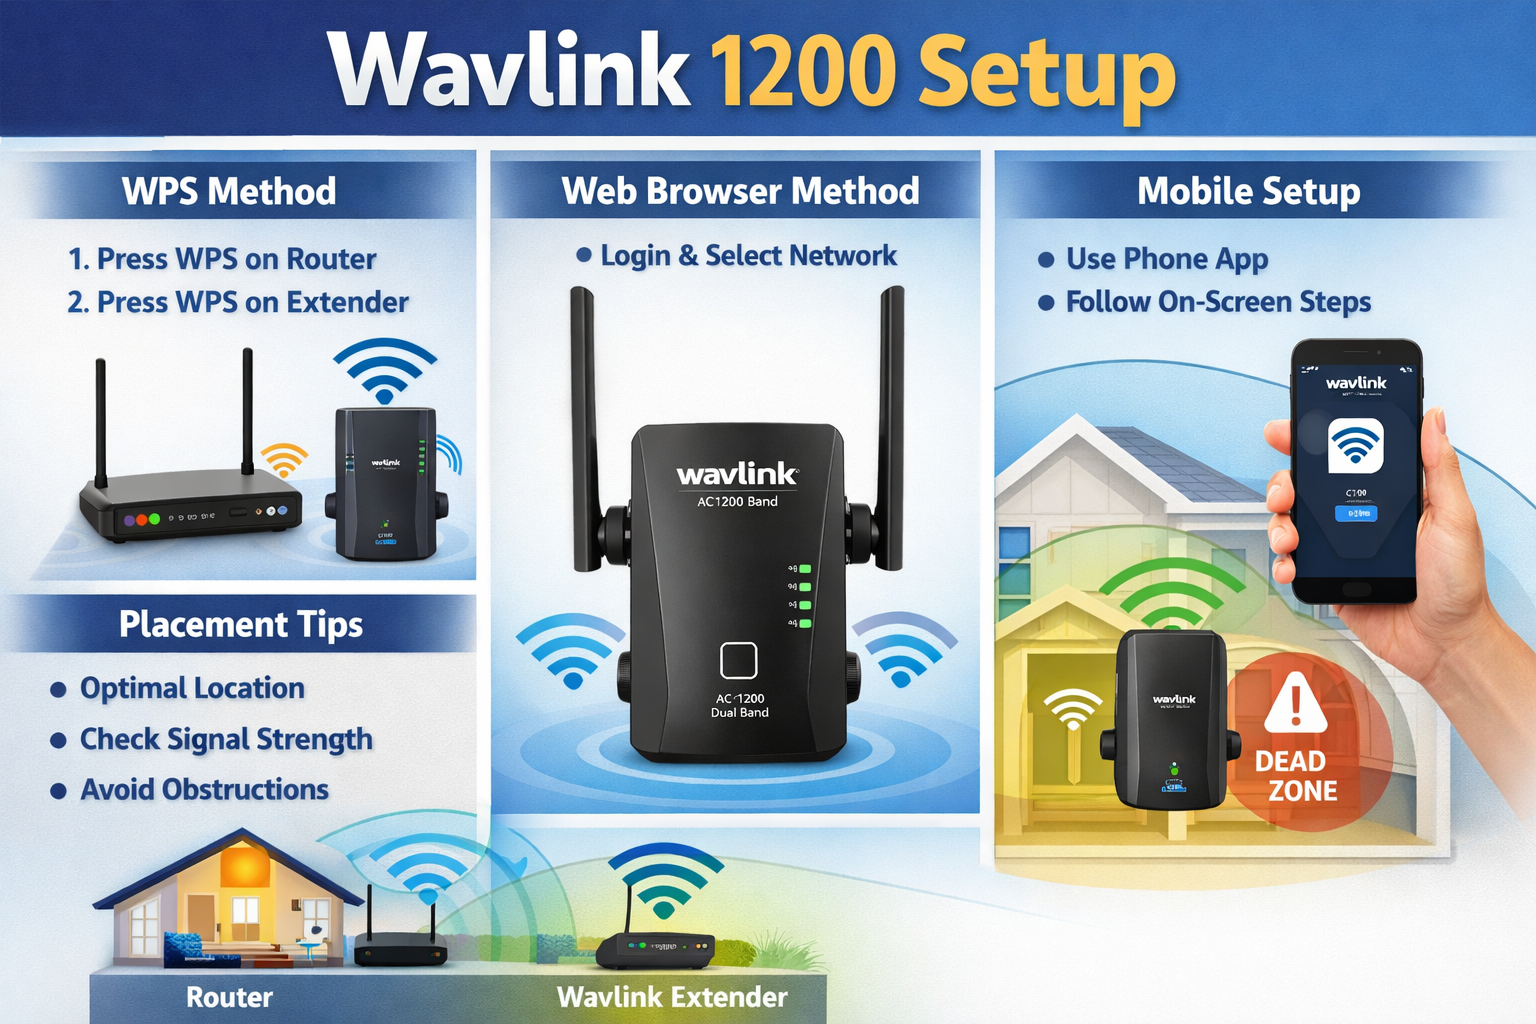
The wavlink 1200 setup is an effective way to boost your wireless network and eliminate WiFi dead zones. This dual-band WiFi extender provides speeds of up to 1200 Mbps and works with most routers. To start the setup, plug the Wavlink AC1200 extender into a wall outlet and wait until the indicator lights become stable. You can connect the extender to your router using the WPS method by pressing the WPS button on both devices. This automatically pairs the extender with your router and completes the initial setup in a few minutes.
For manual wavlink 1200 setup, connect your device to the Wavlink network and open a browser to access the setup page. Log in using the default credentials and follow the guided instructions. Choose your existing WiFi network and enter its password to establish the connection. Once the setup is complete, the extender will start repeating the router’s signal and provide wider coverage. Proper placement and correct configuration ensure that users get stable internet speed, smoother streaming, and better connectivity across their entire space.